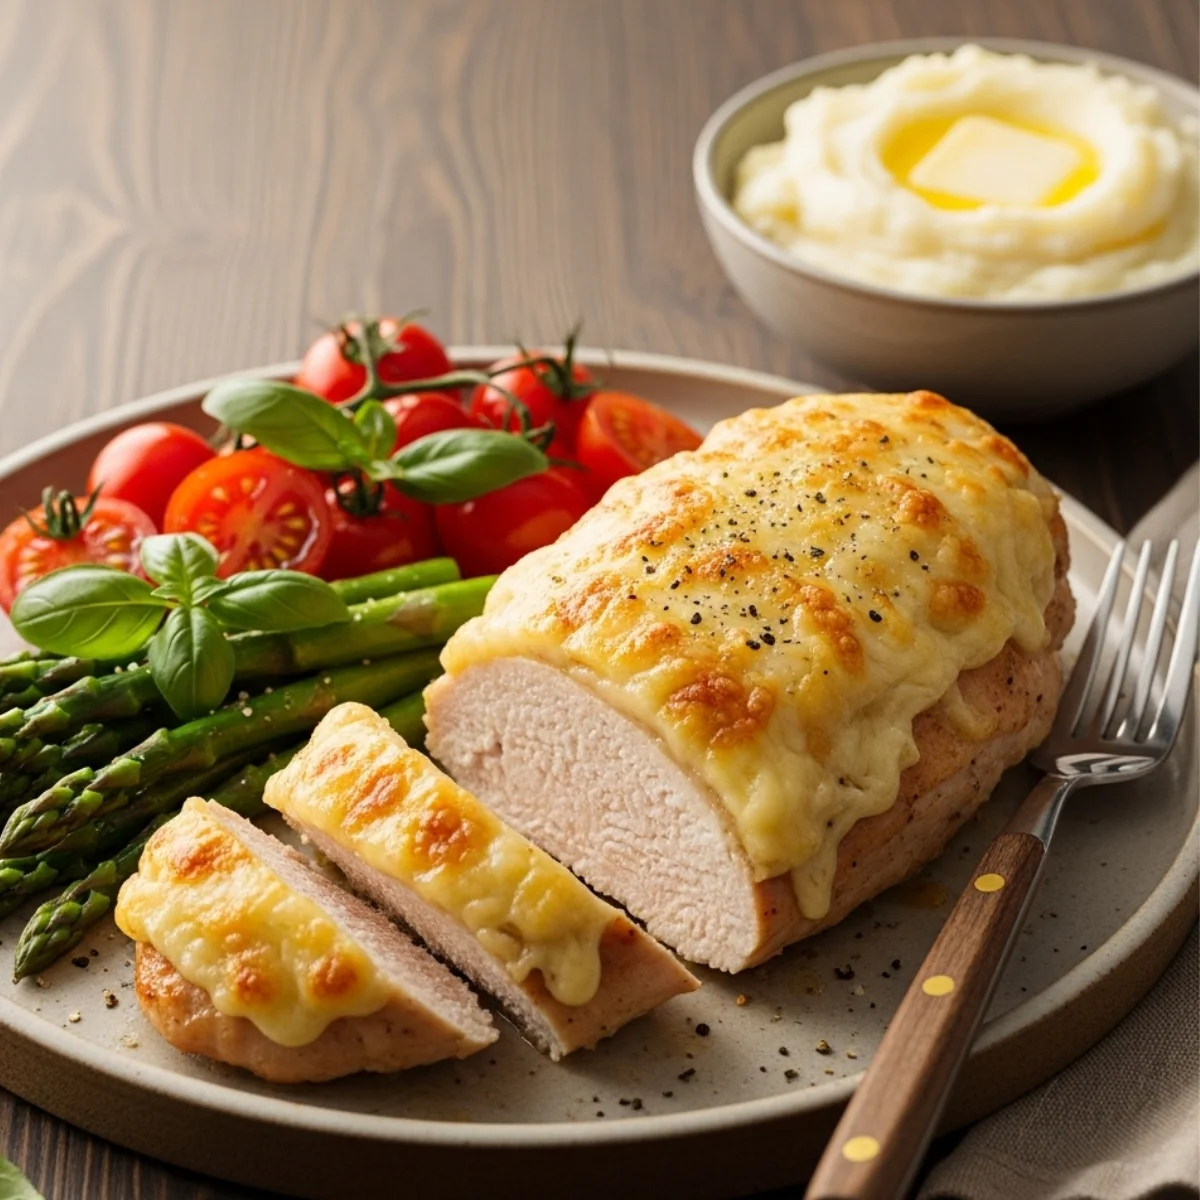
If you’re looking for a chicken dinner that’s incredibly juicy, packed with flavor, and unbelievably easy to make, Melt in Your Mouth Chicken Breast is your new go-to recipe. This dish is perfect for busy weeknights, elegant enough for dinner guests, and comforting enough to satisfy the pickiest eaters. With its creamy Parmesan topping and golden-brown crust, it’s no wonder this recipe has earned a reputation as a family favorite around the world.
Why You’ll Love This Recipe
This is not your average baked chicken breast recipe. Too often, chicken can turn out dry and bland—but not here. The sour cream and Parmesan topping works as a moisture-locking blanket, infusing every bite with rich, tangy, and savory flavors while ensuring the chicken stays tender.
It’s perfect for:
-
Busy families who want a simple yet satisfying dinner.
-
Meal preppers who need a protein-rich option that reheats beautifully.
-
Entertainers looking for a foolproof dish that wows without requiring hours in the kitchen.
Whether you’re serving it with mashed potatoes and green beans or pairing it with a crisp salad and a glass of white wine, this dish is a guaranteed crowd-pleaser.
Ingredients You’ll Need
For the Chicken:
-
3 lb boneless, skinless chicken breasts (trimmed)
-
1 cup sour cream
-
2 tsp garlic powder
-
1 tsp seasoned salt
-
½ tsp freshly ground black pepper
-
1½ cups freshly grated Parmesan cheese, divided
Kitchen Equipment
To make this recipe successfully, you’ll need:
-
9×13-inch glass or ceramic baking dish
-
Medium mixing bowl
-
Measuring cups and spoons
-
Spoon or spatula for spreading
-
Sharp knife (if trimming or slicing chicken breasts)
-
Paper towels (for drying chicken)
-
Oven-safe thermometer (for checking doneness)
Step-by-Step Directions
1. Preheat the Oven
Set your oven to 375°F (190°C). Lightly grease your baking dish with nonstick spray or a drizzle of oil to prevent sticking.
2. Make the Creamy Topping
In a medium bowl, mix together the sour cream, garlic powder, seasoned salt, black pepper, and 1 cup of Parmesan cheese. Stir until smooth and evenly combined. This topping is the secret to sealing in the chicken’s natural juices and adding a burst of cheesy, tangy flavor.
3. Prepare the Chicken
Arrange the chicken breasts in the baking dish in a single layer. If the breasts are very thick, slice them in half horizontally to ensure even cooking. Pat them dry with paper towels so the topping adheres better.
4. Coat with Sauce
Generously spoon the sour cream mixture over each chicken breast, spreading it evenly to cover the surface completely.
5. Add the Finishing Touch
Sprinkle the remaining ½ cup of Parmesan evenly over the top. This extra cheese creates a beautifully golden, crispy crust.
6. Bake to Perfection
Bake for 25–30 minutes, or until the internal temperature reaches 165°F (74°C). The topping should be bubbling and just beginning to brown.
7. Broil for a Golden Finish
Turn the oven to broil and cook for an additional 2–3 minutes until the top turns perfectly golden. Watch closely to prevent burning.
8. Rest and Serve
Let the chicken rest for 5 minutes before serving. This step helps the juices redistribute, keeping the meat tender.
Tips for Success
-
Use freshly grated Parmesan – Pre-grated cheese often contains anti-caking agents that can affect melting and flavor.
-
Thin chicken cooks better – If your chicken breasts are thick, slice them in half for even cooking.
-
Don’t skip the resting time – Cutting into the chicken too soon will release precious juices.
-
Watch the broiler closely – It can go from golden to burnt in seconds.
Recipe Variations
-
Greek Yogurt Swap – Replace sour cream with plain Greek yogurt for a lighter, tangy version.
-
Herb Lovers – Add chopped fresh parsley, thyme, or basil to the topping for extra flavor.
-
Spicy Kick – Mix in a pinch of cayenne pepper or crushed red pepper flakes.
-
Low-Sodium Option – Use reduced-sodium seasoned salt and adjust to taste.
-
Cheese Upgrade – Try a Parmesan–Asiago blend or add shredded mozzarella for extra gooeyness.
Serving Suggestions
This dish is incredibly versatile. Pair it with:
-
Creamy Mashed Potatoes and buttered green beans for a homestyle dinner.
-
Steamed Broccoli and cauliflower rice for a low-carb option.
-
Pasta with Olive Oil & Garlic for an Italian-inspired plate.
-
Fresh Garden Salad with lemon vinaigrette for a lighter pairing.
Wine Pairing: A crisp Chardonnay or Sauvignon Blanc complements the rich, creamy flavors beautifully.
Storing & Reheating
To Store: Place cooled leftovers in an airtight container and refrigerate for up to 3–4 days.
To Freeze: Wrap individual portions tightly in foil and place in a freezer-safe bag. Freeze for up to 3 months.
To Reheat: Warm in a 350°F oven for 10–15 minutes, or until heated through. Avoid microwaving for too long to prevent the chicken from drying out.
Frequently Asked Questions
1. Can I make this ahead of time?
Yes! You can assemble the chicken with the topping, cover, and refrigerate up to 24 hours in advance. Bake when ready to serve.
2. Can I use chicken thighs instead of breasts?
Absolutely. Boneless, skinless thighs will be juicier and slightly richer in flavor. Adjust baking time as needed.
3. Is it okay to use frozen chicken?
Yes, but thaw it completely before baking to ensure even cooking.
4. How do I know the chicken is done?
Use a meat thermometer. The internal temperature should reach 165°F (74°C).
5. Can I double the recipe?
Yes! Simply use a larger baking dish or two 9×13-inch pans, and keep an eye on baking time.
Final Thoughts
Melt in Your Mouth Chicken Breast truly lives up to its name. With a creamy, cheesy topping and a juicy, tender interior, it’s a recipe you’ll turn to again and again—whether for a quick weeknight meal or a special dinner. The best part? It’s virtually foolproof, so even beginner cooks can impress with this dish.
If you try this recipe, please share it with friends and family—and don’t forget to subscribe to our blog for more delicious, tried-and-true recipes you’ll love.
Your next favorite dinner is just an oven away. Bon appétit!