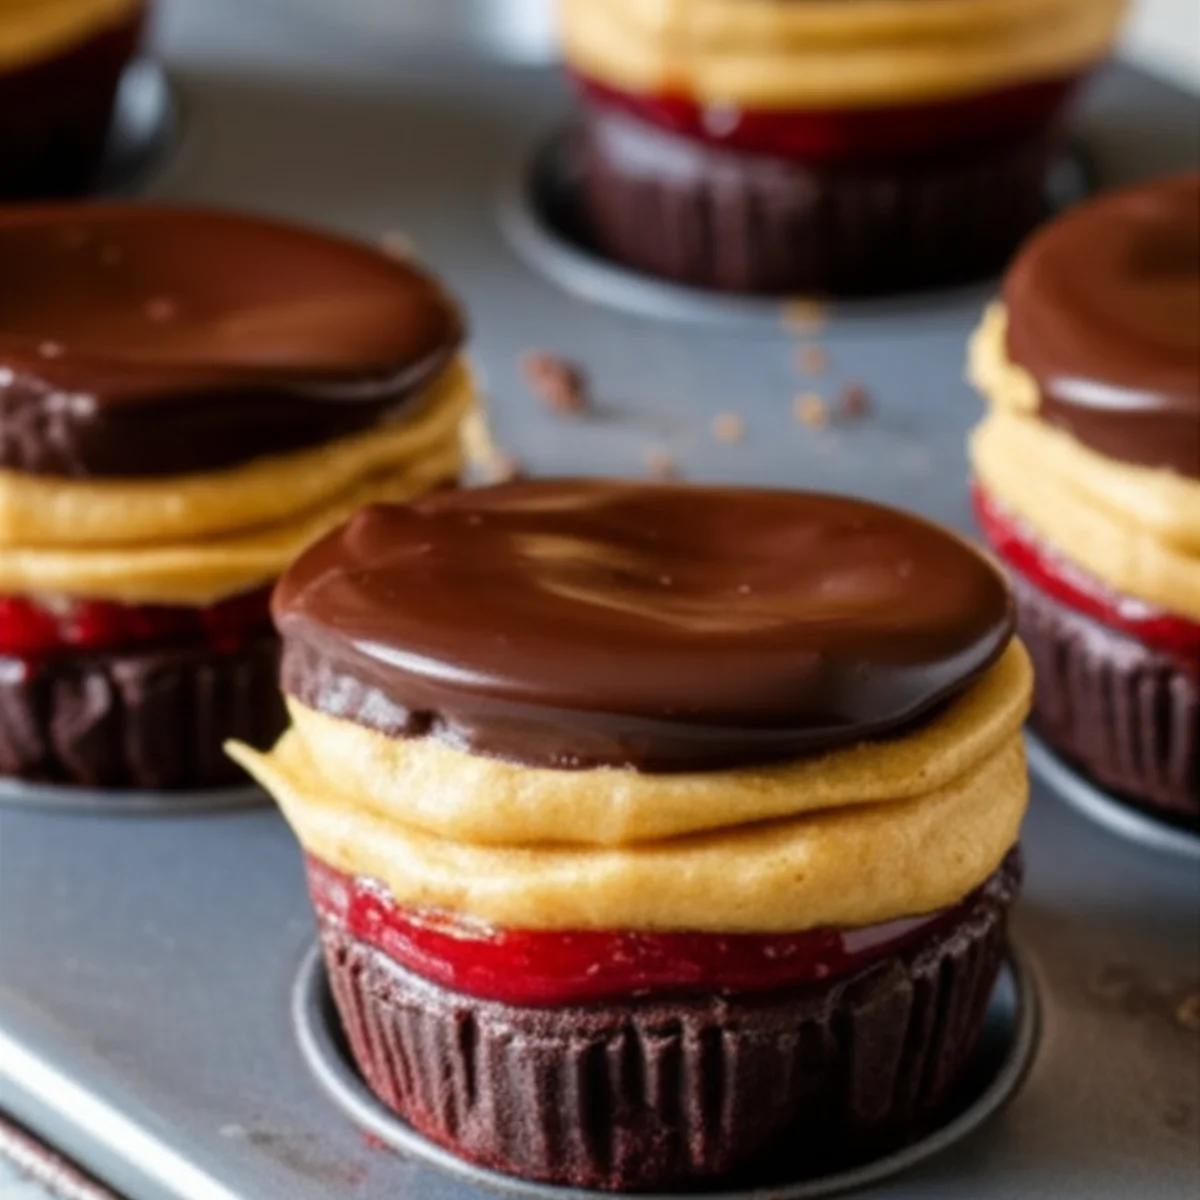
If you’ve been searching for a decadent yet healthy treat that satisfies your sweet tooth without derailing your wellness goals, look no further. Peanut Butter Cherry Chia Jam Cups are the perfect blend of creamy, fruity, and chocolatey goodness. They’re wholesome, simple to make, and packed with nutrients—yet they feel like an indulgent dessert. These little cups are freezer-friendly, portable, and just right for a mid-afternoon pick-me-up or a post-dinner treat.
7 Reasons You’ll Love This Recipe
-
Naturally Sweetened – No refined sugar here. We use honey or maple syrup for a natural touch of sweetness.
-
Nutrient-Packed – Chia seeds bring omega-3 fatty acids and fiber, while cherries offer antioxidants.
-
Perfect for Meal Prep – Make a batch and store them in the fridge or freezer for grab-and-go snacking.
-
Balanced Flavors – The creamy peanut butter, tart cherries, and rich chocolate create a dessert that’s indulgent yet well-balanced.
-
Gluten-Free & Dairy-Free – This treat works for multiple dietary preferences without sacrificing flavor.
-
Quick & Easy – No complicated steps—just melt, layer, and chill.
-
Customizable – Easily swap in different nut butters, fruits, or chocolate to suit your taste.
Ingredients You’ll Need
-
1 cup fresh or frozen cherries, pitted
-
2 tbsp chia seeds
-
2–3 tbsp honey or maple syrup
-
1/2 cup natural peanut butter
-
2 tbsp coconut oil, melted (divided)
-
1 cup dark chocolate chips
-
Pinch of salt
Kitchen Equipment Needed
-
Small saucepan
-
Mixing bowls (at least two)
-
Heatproof bowl (for melting chocolate)
-
Muffin tin
-
Paper liners
-
Spoon or small spatula
-
Freezer space
Step-by-Step Directions
Step 1 – Make the Cherry Chia Jam
In a small saucepan over medium heat, cook the cherries until they begin to soften (about 5 minutes). Lightly mash them with the back of a spoon, then stir in chia seeds and honey or maple syrup. Continue cooking for 2–3 more minutes, then remove from heat. Allow the jam to cool and thicken naturally as the chia seeds absorb liquid.
Step 2 – Prepare the Peanut Butter Layer
In a small bowl, mix peanut butter with 1 tablespoon of melted coconut oil and a pinch of salt. Stir until smooth and glossy. This will make the peanut butter easier to spread and layer.
Step 3 – Melt the Chocolate
In a heatproof bowl over simmering water (or in the microwave in short bursts), melt the dark chocolate chips with the remaining tablespoon of coconut oil. Stir until silky and lump-free.
Step 4 – Assemble the Cups
Line a muffin tin with paper liners. Add about 1 teaspoon of melted chocolate into each cup, tilting the tin so the chocolate coats the bottom evenly. Freeze for 5 minutes to set.
Step 5 – Layer the Goodness
Add 1 teaspoon of the peanut butter mixture to each cup, followed by 1 teaspoon of cherry chia jam, then another teaspoon of peanut butter. Smooth gently with the back of a spoon if needed.
Step 6 – Seal with Chocolate
Pour enough melted chocolate over each cup to cover the filling completely. Tap the tin lightly on the counter to remove air bubbles and ensure an even surface.
Step 7 – Chill and Store
Freeze for 15–20 minutes until set. Store in the fridge for up to 1 week, or in the freezer for up to 3 months.
Tips & Tricks for Success
-
For extra smooth chocolate, temper it by slowly cooling the melted chocolate before pouring.
-
Want a more tart jam? Use less sweetener and allow the cherries’ natural flavor to shine.
-
For a nut-free version, swap peanut butter with sunflower seed butter or tahini.
-
Speed tip: Use store-bought chia jam if you’re in a rush, but homemade always tastes fresher.
-
Avoid soggy cups by ensuring your cherry chia jam is thick before layering.
Variations to Try
-
Strawberry or Raspberry Chia Jam – Switch up the fruit for a different flavor profile.
-
Almond Butter Cups – Use almond butter for a more subtle nutty taste.
-
White Chocolate Drizzle – After the cups set, drizzle melted white chocolate for an extra treat.
-
Protein Boost – Mix a scoop of protein powder into the peanut butter layer.
Storing Your Peanut Butter Cherry Chia Jam Cups
-
In the Fridge: Keep them in an airtight container for up to 7 days.
-
In the Freezer: Store for up to 3 months; let them sit at room temperature for 5–10 minutes before eating.
-
On-the-Go: Pack them in a small insulated lunch bag with an ice pack to keep them from melting.
Perfect Pairings
-
With Coffee or Espresso: The bitterness of coffee balances the sweetness beautifully.
-
With Green Tea: The light, grassy notes of green tea complement the rich chocolate.
-
With a Glass of Red Wine: Try a Merlot or Pinot Noir for a decadent dessert pairing.
FAQ
Q: Can I use frozen cherries?
A: Absolutely. Just thaw them slightly before cooking, and drain excess water for a thicker jam.
Q: What type of chocolate works best?
A: Dark chocolate (60–70% cacao) works beautifully, but milk chocolate will create a sweeter cup.
Q: Can I skip the coconut oil?
A: Coconut oil helps the chocolate set smoothly, but you can omit it if needed—just expect slightly firmer chocolate.
Q: Is this recipe vegan?
A: Yes, if you use maple syrup instead of honey and dairy-free chocolate chips.
Q: How can I make these lower in sugar?
A: Use unsweetened chocolate and reduce or omit the maple syrup/honey.
Final Thoughts
These Peanut Butter Cherry Chia Jam Cups are a blissful mix of indulgence and nutrition. They’re the kind of treat that you can feel good about making for yourself, your family, or to impress guests. With a little prep and just a handful of ingredients, you can whip up a dessert that’s as beautiful as it is delicious.
If you try this recipe, share it with your friends and let them in on this healthy indulgence. And don’t forget to subscribe to our blog for more wholesome, flavorful recipes that will make your kitchen your favorite place to be.